Quick Answer: The Goddler is the Tier 3 final battle, and only 1.5% of players have cleared it — against 71.1% for Tier 1's G.O.A.T. and 9.6% for Tier 2's Killipede. There is no single correct team; ten reported clears use ten different rosters. What they share is one of two structures. Either you build sustain that scales with the fight's length (Vampire/Zombie/Franken/Lich/Farmer is the cleanest example, where healing feeds Farmer stacks endlessly) or you build enough burst to end phase two quickly (Knight/Dentist/Cyborg/Agent/Quantum). The losing shape is the middle: enough damage for the adds, not enough for the boss. The fight then drags, and enemy damage climbs the longer it runs.
Version note: Written August 17, 2026 against v1.0.12-rc.5. Unlock percentages come from Steam's global achievement stats; the team compositions come from players describing their own clears in the game's Steam discussions and are labelled as such throughout. No developer has published boss mechanics, and the official Dudex database has no Goddler entry — everything below the stats is community-sourced.
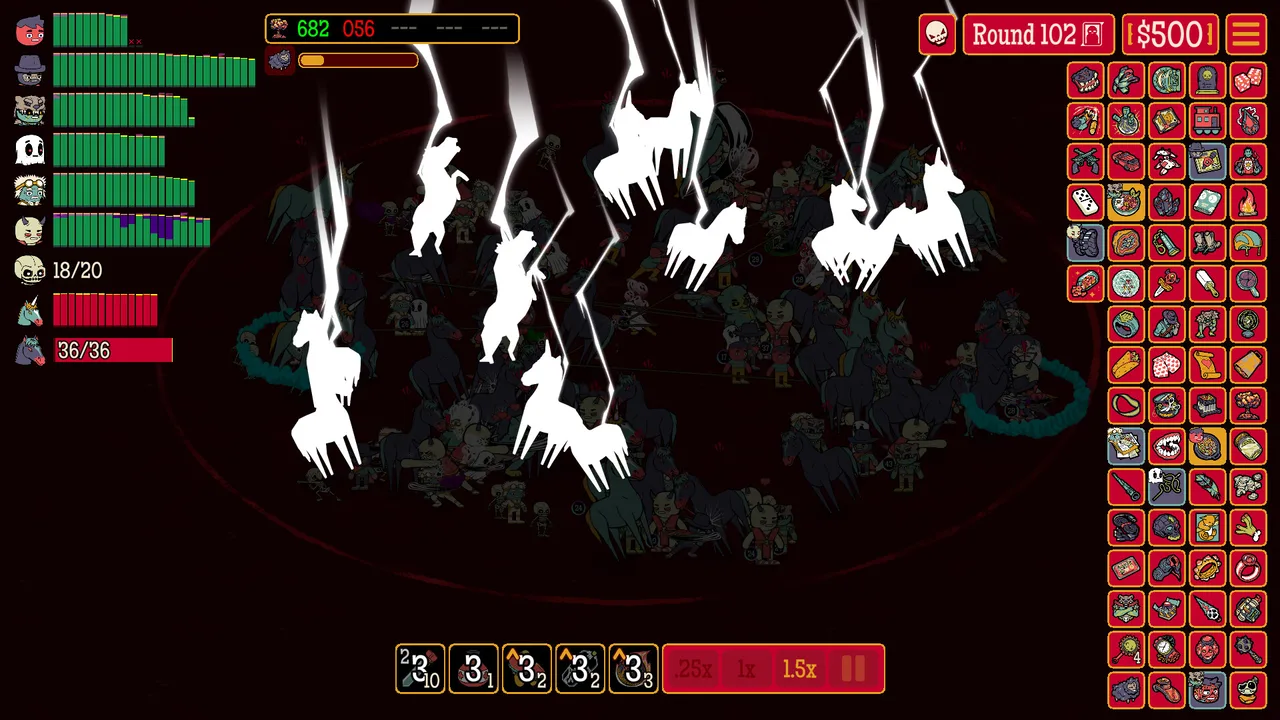 Late Tier 3 rounds look like this before the boss even arrives. The Goddler adds continuous waves on top. (Screenshot: Butterscotch Shenanigans)
Where the Goddler Sits
Each Tier ends in a boss, and the unlock rates make the shape of the climb obvious:
| Tier | Final battle | Players who have cleared it |
|---|---|---|
| Tier 1 | G.O.A.T. (round 105) | 71.1% |
| Tier 2 | Killipede | 9.6% |
| Tier 3 | Goddler | 1.5% |
The Tier 1 to Tier 2 drop is mostly the per-Dude Gold Star unlock rule rather than difficulty — people stop because the grind to bring a roster up is long. The Tier 2 to Tier 3 drop is different. By the time you have Gold Stars across a Tier 2 roster you know the game, so the 9.6% → 1.5% fall is the fight itself.
The Two Phases, and Which One Ends Runs
Players consistently describe reaching phase two and losing there rather than failing at the opening. One account of a first Tier 3 attempt puts the mechanism plainly:
"Managed to get to its second phase on my first run of level 3, but i didnt have enough damage to get through it before it slowly grinded down my team with its armies of mobs. Having a team that can quickly and reliably take out both the mobs and its health seems like a must, else the fight drags and thats not good when the damage of your enemies slowly creep up the longer the fight goes on."
That is the whole failure mode. The Goddler brings continuous adds while its own health bar needs chewing through, and the fight is not a fixed-length encounter — the longer you take, the harder incoming damage gets. A team that handles one of those two jobs but not the other loses on the clock.
So the decision you are actually making when you build is: do I outlast this, or do I end it? Both work. Trying to do a bit of each is what does not.
Route One: Sustain That Scales With the Fight
The clearest reported version of this is a full Undead-plus-Farmer stack:
"Beat both phases with Vampire/Zombie/Franken/Lich/Farmer. The battle took a pretty long time, but all the healing coming out of vampires and franken into the farmers provided more than enough sustain, while both the healing and the revenant stacks scaled the farmers endlessly as the fight dragged on."
The logic is worth extracting, because it inverts the failure mode above. If your scaling is driven by the fight's duration, a long fight stops being a problem and becomes the plan. Farmer stacks grow off healing and revenant procs; Vampire and Franken supply both continuously. The boss's attrition strategy is running against a team that gets stronger under attrition.
The same player adds a damage note that is easy to miss: roughly 13 Zombies carrying Fedora (against 47 Vampires at the high end) were his highest damage dealers outside the boss fights, as long as they exploded often enough.
A second sustain clear takes the same shape through a different door — Quantum, Lich, Wizard as thralls, Vampire, Psi — and comes with the most specific ratio anyone has posted:
"You need AT LEAST three times as many thralls (in this case Wizards) as you have litchs. Face tats on the litch to force redirection to them (and thence on to the thrall). Thralls have bad credit plus as many deflection items as possible, so the ONLY damage they take is from the litch. Ghillie suit on the quantums so they don't get cleaved. As many save your life items as possible - batwings, oh dang, smelling salts, etc. Caged tiger, living will, ancient sword, etc. to summon skelies."
His verdict: "the goddler was a toddle." This is one player's own build rather than a tested formula, but it is internally consistent with the Lich and deflection mechanics the developers have described — damage routed into a thrall pool that is itself protected is damage that never reaches your carries.
Route Two: Burst That Ends Phase Two
The most structured burst report:
"My team was Knight, Dentist Cyborg, Agent, and Quantum. Knight for the taunt and toughness trinket. Dentist for the damage reduction, healing, and staggered damage for dudes. Cyborg - stacking damage buff plus the [trinket] where every 100 stacks of extermination you get 1 second of deflect... when you get about 20 of the other dudes, just stack cyborg. Agent - secondary damage dealer plus the buffs that he can give when he dashes to another dude. Quantum - main healer and makes the early game easy."
Two things in there generalise beyond the specific roster. Quantum carries the early game, which is what buys you the economy to build a boss-killing team at all. And Cyborg is the stacking win condition — once your other five roles are covered at around 20 each, further purchases go into Cyborg rather than being spread evenly.
Two shorter clears follow the same logic with different pieces: Cleric/Finance/General/Lich/Quantum, where the poster notes that "lich + any type of healing that scales with damage is pretty strong"; and Frankens/Cyborg/Burgers/Echos/Knights at Tier 3 level 118, described as "almost invincible" although the last two rounds cost half the team.
Two more, from a player who has cleared it twice: Quantum/Dentist/Pirate/Necro/Bard and Quantum/Dentist/Zombie/Assassin/Ranger. Quantum and Dentist appear in both, which is the closest thing to a consensus pair anywhere in these reports.
The Economy Shortcut Nobody Argues With
One player who has beaten the Goddler repeatedly reduces the whole problem to a single Dude:
"I beat him many times. Finance dude makes it trivial because you get all relics available."
That is one voice, but it is corroborated indirectly by how the other winners describe their runs. A Daily Dude clear that leaned on roughly 60 Cyborgs with Medical License describes the route that actually produced the win:
"Got an early Vault Relic. Did my normal thing of making it to the 3rd (last) Investment Dude encounter and getting about 50K back on it. Then just bought up all the relics and smashed him."
The pattern under both accounts is the same: a Tier 3 clear is usually decided by how many relics you can afford before the boss, not by which Dudes you drafted. Finance and the Investment Dude encounters are the two levers on that, and the Smuggler with reroll support (Heartshaped Boxers, the Coupon relic) is how the same player converted cash into the specific relics he wanted.
If you are choosing what to prioritise mid-run and you are not sure, prioritise the thing that buys relics.
What "Any Dude Can Do It" Actually Means
One clear is reported in five words — "i did it with hacker" — and it is worth taking at face value rather than dismissing. Across ten reported clears the rosters barely overlap: Knight/Dentist/Cyborg/Agent/Quantum, Cleric/Finance/General/Lich/Quantum, Vampire/Zombie/Franken/Lich/Farmer, Cyborg/Farmer/Samurai/Mummy/Caveman, Quantum/Lich/Wizard/Vampire/Psi, Franken/Cyborg/Burger/Echo/Knight, Quantum/Dentist/Pirate/Necro/Bard, Quantum/Dentist/Zombie/Assassin/Ranger, a 60-Cyborg stack, and Hacker.
Do not go looking for the correct team. Go looking for whether the team you have answers the two questions the fight asks — can it clear adds continuously, and can it get through a large health bar before the damage ramp catches you. If the answer to both is no, more relics is the fix, not a different roster.
Why the Difficulty Feels Random Before You Get There
A complaint that recurs alongside the Goddler threads is that a team can flatten one round without a loss and then be wiped in the next. Two explanations circulate, and they are complementary rather than competing.
The first is compositional, from a player answering the "power level" question:
"The game is balanced so that different comps have different strengths and weaknesses, and when your run gets abruptly ended it's because you went up against a round that exploited your comp's weakness. For example, you might have a comp that's very strong against smaller fights against a handful of heavy-hitters, but weak against fights featuring massive swarms. You might have had very effective tanks, but then come up against 300 badgers that don't care about your taunts and start ripping into your squishies."
The second is narrower and more actionable: when enemies wreck you it is usually a specific enemy trait, with cleave named most often. That matches the taunt behaviour already documented — a Dude that dashes into an existing attack eats the splash, and taunt resistance means your tank is not holding what you think it is holding.
Decision rule before a Tier 3 round: read the enemy special moves on the round options rather than the payout. There is no in-game power-level indicator and no bestiary — players have asked for both — so the enemy abilities are the only forward-looking information you get.
Getting There: Gold Stars First
None of the above matters until your roster is legal at Tier 3. Gold Stars are per Dude and cascade downward, so the efficient route is to earn them at the highest Tier you can actually win at, not to grind Tier 1 with each Dude in turn. The rule, the developers' own wording for it, and the round thresholds that are still unconfirmed are all on the Tier Unlock Guide.
If you are chasing the Family-only achievements as well, do those at a Tier you are comfortable in — they and the Goddler pull in opposite directions, since the Goddler wants your best cross-family combination and the Family runs forbid exactly that.