Quick Answer: Par times are the gate on Paradox Mode's 70+ modifiers and on Speed Demon, an achievement 0.1% of players hold. The technique that separates the people who beat them from the people who bounce is simple and counter-intuitive: only kill what is standing in your path. These times are tuned for a beeline, so every optional fight is a failed run. Two more from players who have cleared them — you can dodge bullets, so approach enemies at an angle, and use explosives on cameras instead of shooting them. Treat mission par times and Challenge par times as separate projects: the first are hard, the second need luck as well as execution.
Version note: Written August 17, 2026 against v1031, current for v1032 and checked August 20. Techniques below come from players describing their own par-time clears in the game's Steam discussions, attributed in place; the developer has published no par-time values and none appear in-game before you finish a mission. We have not cleared the full par-time set and do not publish times we have not verified.
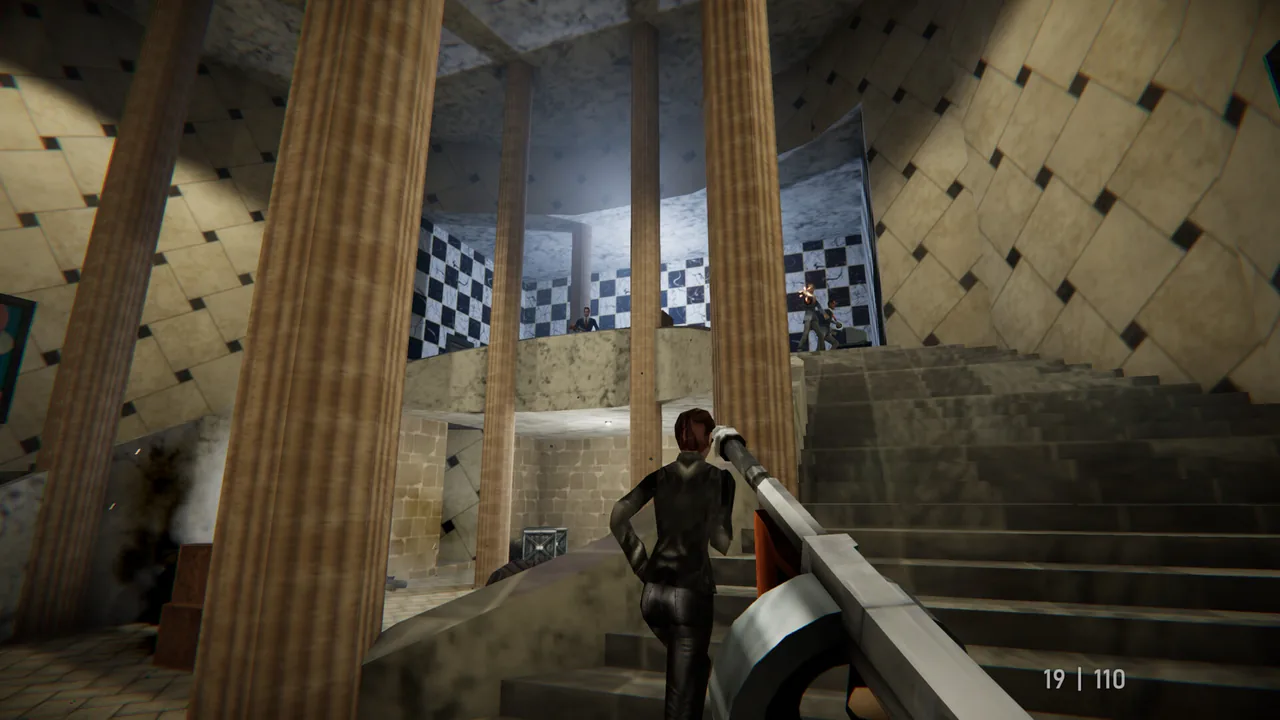 Open rooms like this are where par-time runs die — every guard you stop to fight is time you do not get back. (Screenshot: Replicant D6)
What You Are Chasing
Par times attach to missions and to Challenges, and beating them does two things:
- Unlocks Paradox Mode modifiers — over 70 cheats and modifiers, from Big Heads to No Reload. This is the game's version of the N64 cheat-unlock ritual, and it is the main reason to chase pars at all.
- Feeds Speed Demon, the achievement for beating every par time in both Story and Challenges. It sits at 0.1% alongside League Champion and Elite Agent, and has not moved since launch. See the achievements guide for the full table.
Where the reward lands once you earn it, and the display bug that hides it, are covered on the missions and Cyphers page — the short version is that unlocks live in a Paradox Mode submenu on the specific mission, not in a global options screen.
The Techniques That Work
Four things recur across players who have actually beaten par times, and one of them comes from a player who has unlocked every achievement in the game.
Only fight what blocks you. From the player with all achievements: "the key to 'Par Times' is that you only need to defeat the enemies that are in your path." This is the highest-value habit on this page because it inverts the instinct the rest of the game trains. In a normal run you clear a room. In a par run, a guard who is not between you and an objective does not exist.
Approach at an angle. From the same player: "since you can dodge bullets in this game, it's best to always approach enemies at an angle." Enemy fire is dodgeable rather than hitscan, so a diagonal approach converts a trade into a free kill — and more importantly, into a kill you do not have to stop moving for.
Use explosives on cameras. A player struggling with Castle's par time on 64 Agent complained that the mission hands you two poor weapons for shooting cameras reliably. The reply is a route fix rather than an aim fix: "Don't shoot the cameras. Use your bombs for them. You can also bomb the chains from below so you don't need to go up top for the chains." That second half is the bigger saving — a vertical detour removed entirely.
Turn the sensitivity up and pace yourself over days. From a player working the Challenge pars: you have to know the level and the spawn points, "High sensitivity also.... as much as you can muster," and "I wouldn't try to do this in one setting." Route knowledge before speed is the consistent order — several players describe learning a mission on Agent difficulty first specifically because the layout carries over.
The Aim Assist Setting Decides How the First Three Work
This is the setting most par-chasers have an opinion about, and it is on by default. It is ON or OFF with nothing in between — no strength slider — and multiple players describe the default as extremely strong.
What it does, in players' own descriptions: it pulls your aim to the enemy's chest. One player's account is the clearest: "Every encounter without aim mode would lock my aim to the enemy's chest, instead of letting me shoot them in the face. Even up close." Another notes it fires even when you were already on target, dragging your aim several centimetres to the torso when the head was a millimetre away.
The consequence par runners care about is the one nobody mentions in the aim-assist argument: it also grabs you when you are trying to shoot past an enemy. Per a player in that thread, shooting an explosive barrel near a guard is almost impossible without pulling up the crosshair, because if the barrel is close enough to hurt the guard, the guard is close enough to steal your aim. That directly collides with the explosives-on-cameras and bomb-the-chains routing above.
So pick deliberately rather than by default:
- Leave it on if your route is "kill the two guards in the doorway and keep running." Chest lock is faster than a deliberate headshot and you never stop moving.
- Turn it off if your route depends on hitting objects — barrels, cameras, chains — near enemies, or if you want predictable aim. Several players say the same thing about switching it off: it is harder but consistent. One describes it as "a much more rewarding experience switched off"; another switched purely because "my aiming is more predictable."
It is not a bug and it is not going away. A player familiar with the source material explains the design intent — GoldenEye and Perfect Dark leaned on heavy aim assist precisely so the game could be about fast traversal and firing lines rather than precision shooting, and Agent 64 replicates that. The open request is for a middle setting, and the developer has not replied to it.
Mission Pars and Challenge Pars Are Different Problems
This distinction saves a lot of wasted effort, and it comes from a player who cleared all the Contracts before hitting the wall:
"I did all the Contracts, those were fun and some of them took several attempts without being too irritating. The Challenges above the Starter League really aren't if you're going for the par times... because you need both perfect play and a good amount of RNG."
And his summary of the split: "The par times on the Challenges are very hard and leave little to no room for error. The par times in the stages, while still tough, are IMO much more manageable."
Advanced Challenge 2 is the one named most often, and the reasons are specific rather than vague: you die in one hit, respawning takes four to five seconds, you are sometimes killed again before you can move, and the bots hit with pinpoint accuracy while you have no auto-aim at all.
Decision rule: do the mission par times first. They are the ones that reward route learning, which is a skill that compounds. The Challenge pars above Starter League are a separate grind with a luck component, and treating them as the same project is how people conclude the whole system is broken.
The Controller Disadvantage Is Real
Three separate players raise it, and the mechanism is not preference:
- There is no auto-aim, while the bots shoot accurately. On mouse you can close that gap; on a stick you cannot.
- The Aim Mode sensitivity slider reportedly does nothing on an analogue stick — one player reports values of 1 and 400 feeling identical on an 8BitDo Pro 2. That is a single report, but it removes the one adjustment that would help.
- Ten players have asked for separate controller sensitivity sliders — turning too slow, aim mode too fast — with no developer reply as of v1032.
If you are chasing Speed Demon and you have the choice, use a mouse. If you do not have the choice, expect the Challenge pars in particular to cost substantially more attempts. Full controller status: Fixes & Performance.
The Bookkeeping Problem
Par times are not shown on the level select screen. They appear only when you complete a mission, which produces a genuinely silly workflow that one player describes doing anyway:
"Right now, I am starting levels on each difficulty and then just aborting until I find the par time. I love the game, but this is one thing that is frustrating me."
The request is now louder than one thread. A streamer who completed the game in both single-player and multiplayer put "an indicator in the menus for par times in story mode, just like in multiplayer challenges" at the top of a community feedback list, and several more players echoed it in the par-time thread itself — "can we just have the par time on the mission select screen? It's annoying if you forget which difficulty has the par time." Note what that reveals: multiplayer challenges already show their par times, and story mode does not. The developer has not answered as of v1032.
Until he does:
- Write down every par time the completion screen shows you. There is no other way to look one up.
- Note which difficulty it was on. The par time is tied to a specific difficulty tier, and that is the part people lose track of.
- Check the Paradox Mode submenu on that mission after you beat one — and see below, because the display bug behind this was fixed on August 17.
The Missing-Unlock Bug Is Fixed
Rewards that had been earned but did not appear until you left and came back were a real defect, acknowledged by the developer and unsuccessfully fixed once in v1020. v1032 (August 17) fixed it properly: "Fixed some mission unlocks not happening right away when unlocked (Gilded Character Skin for instance)."
Practical effect: an unlock that does not appear on the current build is a missing unlock, not a delayed one. Before v1032 the correct advice was to go and check the submenu before replaying anything. Now, if a Paradox Mode option or a skin genuinely is not there after you beat the par, you have grounds to report it rather than assume it will turn up.
Managing Expectations
Two things worth knowing before you commit a weekend.
The times are tuned tightly, and experienced GoldenEye players say so. One player who has 100%'d GoldenEye 007 describes even the first beginner Challenge — a one-on-one against a single opponent — as taking a long time, because you have to know the spawn points, go straight at him, and hope he does not find a gun first. Another puts it in speedrun terms: to hit these you have to beeline objectives exactly as GoldenEye world-record runs do, where "a single second wasted on getting snagged on an enemy or knocked back from damage means a failed run."
Some of the clock is not yours to spend. Castle is the clearest case, and it is why that mission gets named more than its length justifies: it contains a scripted wait for Dana to finish a hack, and a player attempting its par on 64 Agent reports that "half the time its 5 - 15 seconds just waiting for her to come in to the room." That window is not something route knowledge shortens. Add it to the two poor weapons the mission hands you — the reason the bomb-the-cameras route matters most here — and Castle is a par where a clean run can still miss on a die roll you did not make.
But it is not uniform. One player reporting his best on the first level as five seconds off par came back with an edit after trying the second: "Okay, I done the second one, easy. I guess its only true for SOME level." If a par time feels impossible, the useful move is to go try a different one rather than assume the whole set is out of reach.
One reported bad apple: a player names the vampirism challenge on mission 3 as effectively impossible because walking drains too much health. That is one account with one agreement in the thread and no developer response, so treat it as a warning rather than a verdict.
"Par Times Are Literally Impossible" — What That Argument Actually Turned Up
A thread with that title ran a few days and produced two things worth having, buried in an argument that mostly was not about technique.
They are being cleared, on video. One participant answered the impossibility claim by linking a YouTube clear, and a second player states flatly that he has the pars. That does not make any individual par reasonable, but it moves the question from can this be done to what is the route.
The one concrete disagreement is about body armour, and both players are describing the same run. The complaint: the armour is behind a glass wall with two guards, costing at least five seconds and risking the run outright. The answer: there is a second body armour later in the level, on a chair, with no glass and no guards around it — reachable with the automatic weapon you have already picked up by then.
The decision rule that falls out of it: do not treat the first pickup you see as the one the route wants. A pickup that costs a detour and a fight is not free even when it is closer. This is the same principle as the only-kill-what-blocks-you rule applied to items rather than enemies. Neither player names the mission, so check your own level for a second, cheaper pickup before you build a route around the expensive one.
The rest of that thread is the two of them arguing about whether luck or skill is at fault, which is worth skipping. The luck complaint is not baseless — it is the same point the Castle section above makes with better evidence.
What Else Cyphers and Acts Have to Do With This
Nothing directly — par times and Cyphers are separate currencies — but one observation from a player working through the late campaign is worth logging: you still earn Cyphers in Act 4 levels, after the last Act gate has already opened. His guess is that something unlockable later needs a high number of them. That is speculation with no developer statement behind it, but if you are already replaying missions for par times, you are accumulating Cyphers regardless. How the Act gates themselves work: Missions, Difficulty & Cyphers.